Marketplace and Cube: Operations Guide
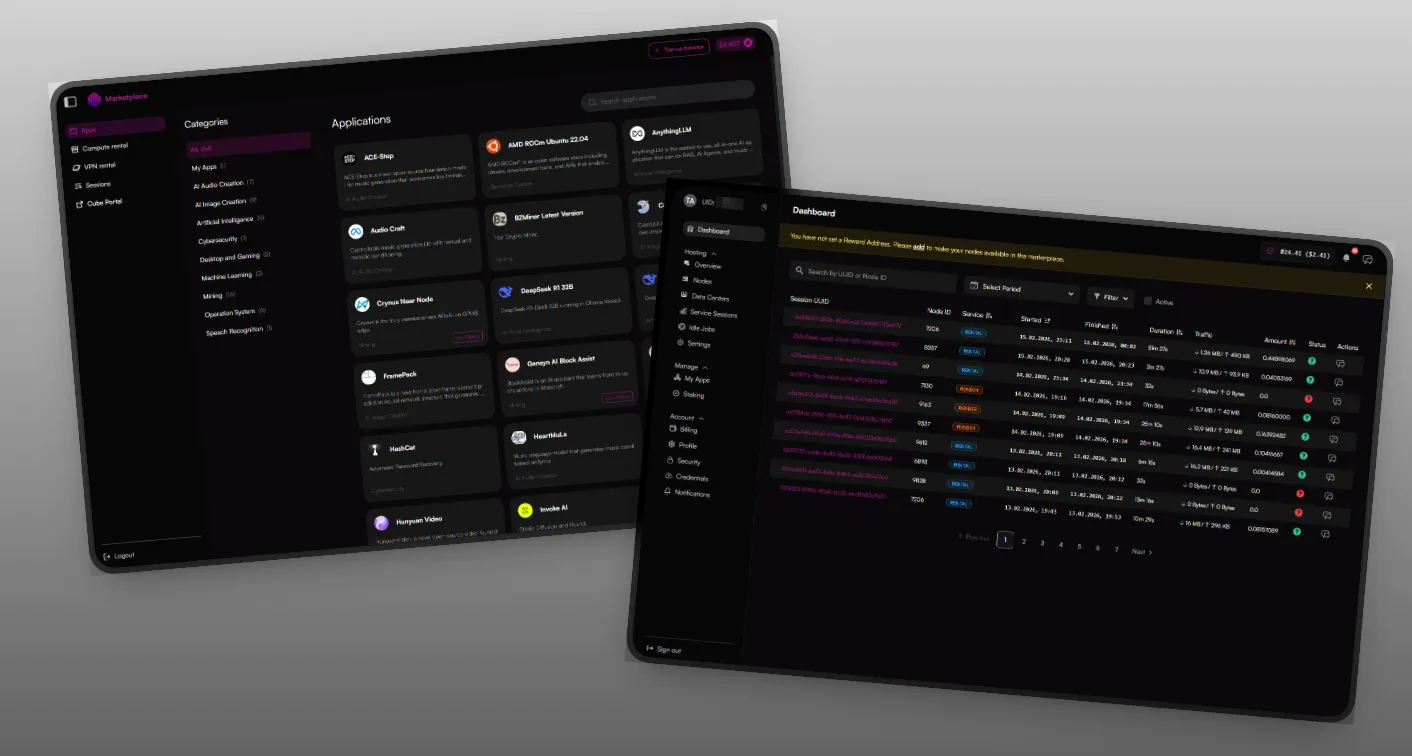
The OctaSpace ecosystem is managed through two primary interfaces: the Marketplace for application deployment and the Cube for comprehensive account, billing, and infrastructure orchestration. These platforms share a unified authentication system, allowing for seamless navigation between renting resources and managing your account.
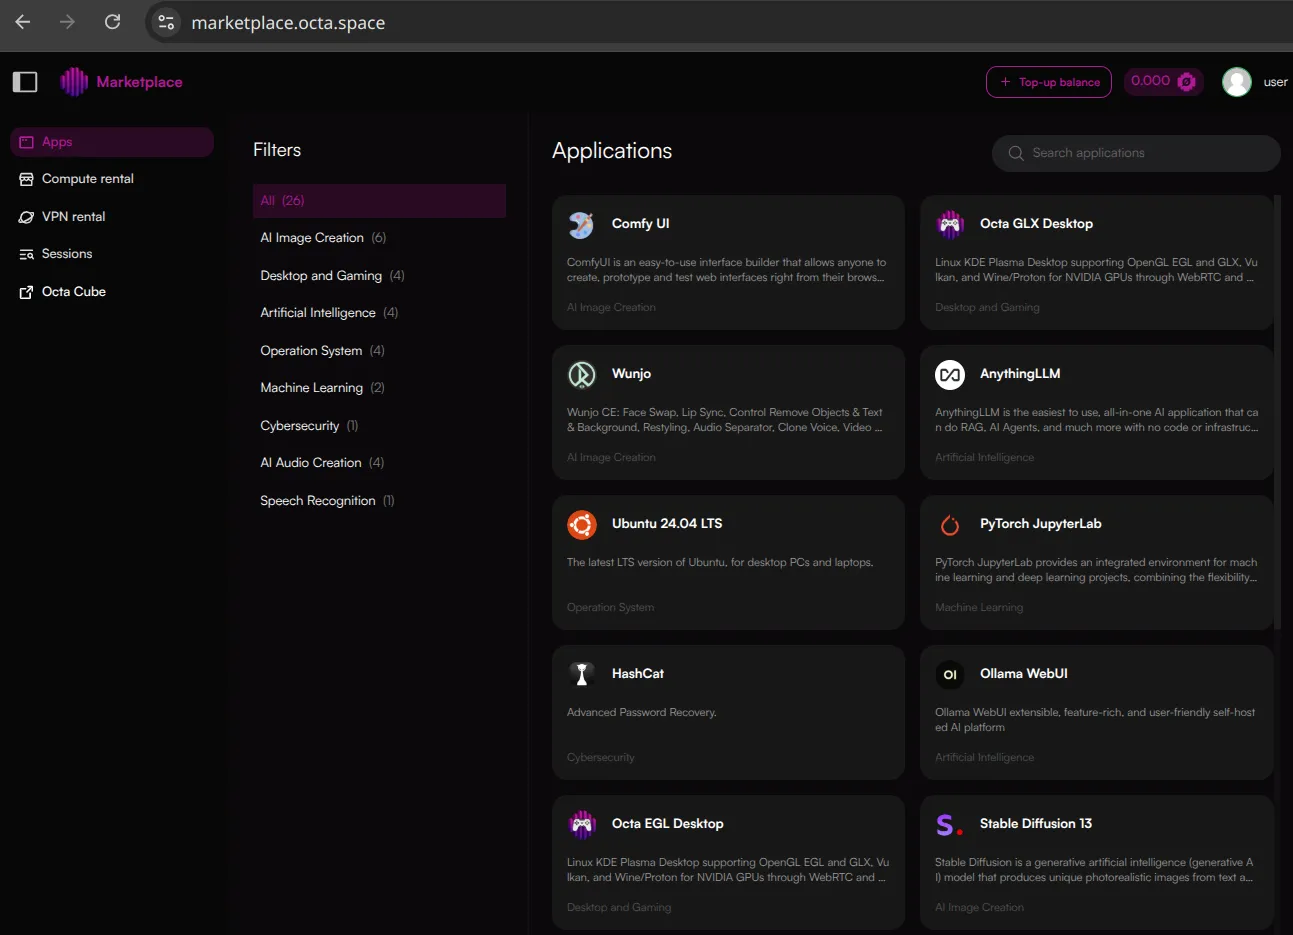
The OctaSpace Marketplace
The OctaSpace Marketplaceis a powerful, decentralized platform designed to streamline the deployment and management of applications across a global network of user-hosted nodes. By utilizing optimized application images, the marketplace enables users to select, configure, and launch complex workloads with minimal technical friction.
Core Marketplace Workflow
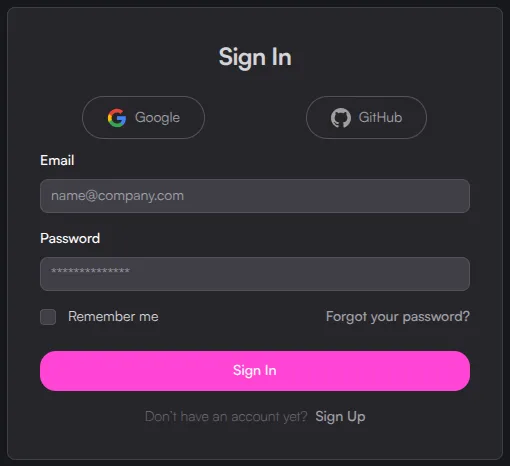
- Authentication: Access the Marketplace using your OctaSpace credentials. You can create a new account via email or use Google, Apple, or GitHub for single sign-on. Authentication is shared between the Marketplace and the Cube.
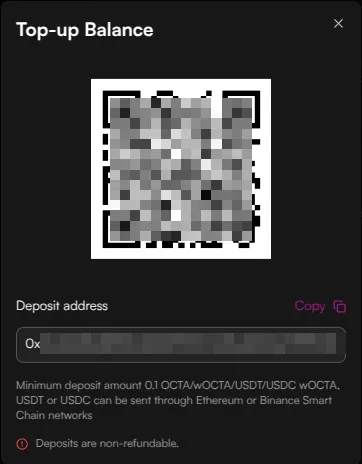
- Account Funding: Use the "Top-up balance" button to add OCTA coins to your marketplace balance. A unique wallet address and QR code will be provided. Note that funds in the Marketplace wallet are for service use and cannot be withdrawn.
- Browse Applications: Navigate to the Apps dashboard to find pre-configured application images categorized by use case (AI, Rendering, etc.). Hovering over an application card provides additional descriptions.
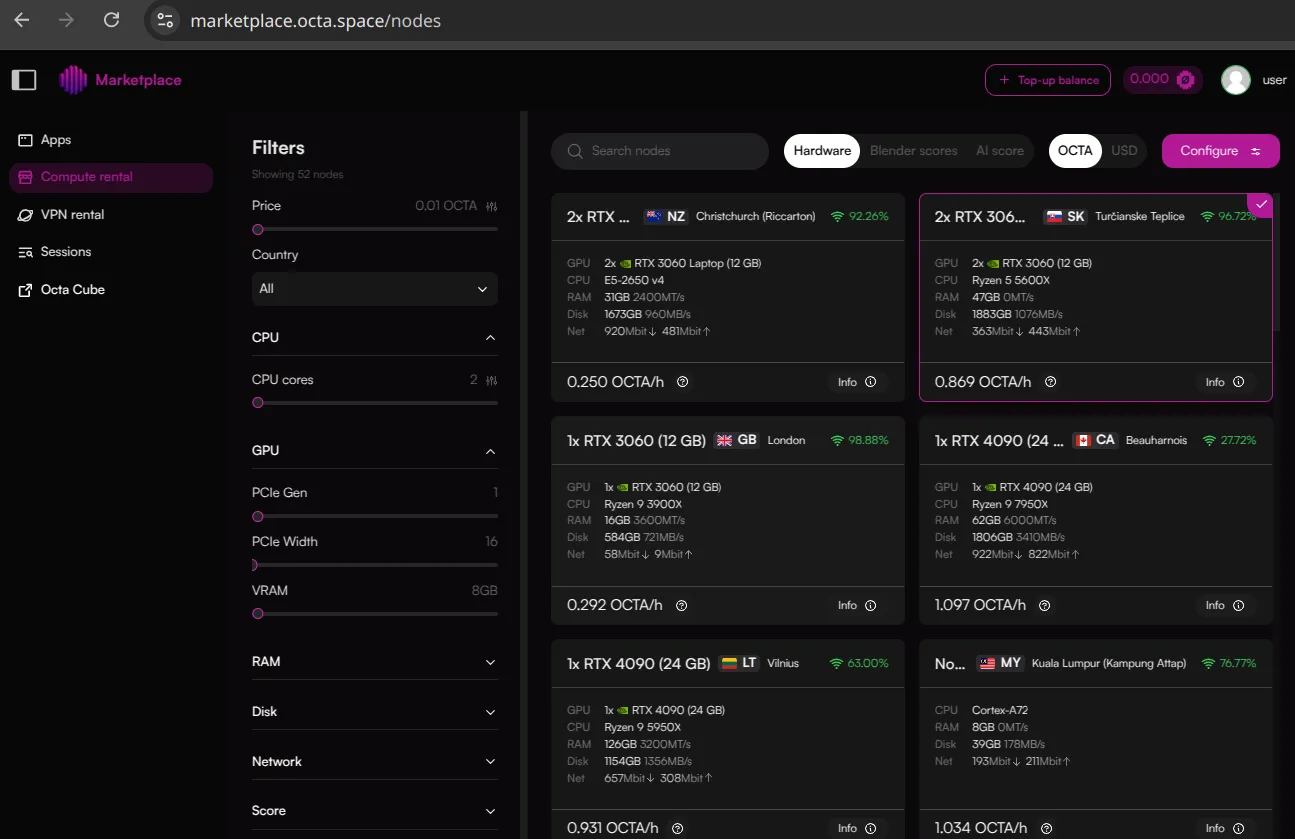
- Node Selection: Choose target nodes based on real-time filters such as price, location, hardware specs (CPU/GPU), and benchmark scores (Blender/AI). You can toggle between OCTA and USD pricing for easier cost estimation.
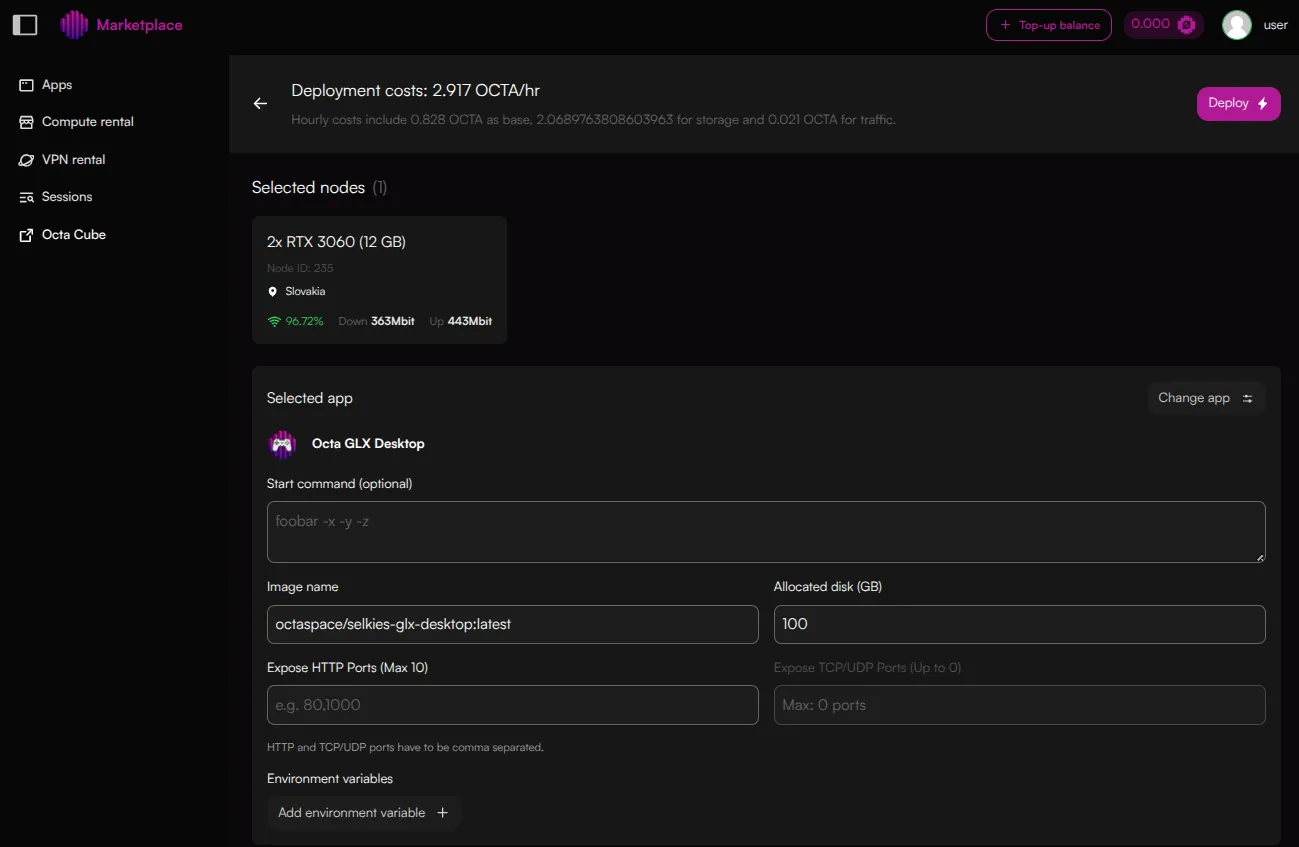
- Configure and Deploy: Customize your deployment by overriding default start commands, using custom Docker images, or adjusting allocated disk size. You can also map specific HTTP, TCP, or UDP ports and set environment variables.
- Manage Sessions: Once deployed, the Sessions dashboard provides real-time tracking of active applications, including duration, traffic, and per-minute billing.
The OctaSpace Cube
The OctaSpace Cube is the centralized management dashboard for both resource consumers and node providers.
For Users
The Cube acts as your personal command center for account and session oversight:
- Historical Data: View details and logs for all past sessions.
- Security & Profile: Update passwords, enable Two-Factor Authentication (2FA), and manage your SSH public keys for secure node access.
- Provider Communication: Use the built-in messaging system to communicate directly with node providers for support or specialized coordination.
For Node Providers
Node owners use the Cube to orchestrate their infrastructure and maximize earnings:
- Node Orchestration: Configure and monitor the health of your provided nodes.
- Idle Job Management: Set up background tasks to monetize your hardware when it is not being actively rented.
- Earnings Tracking: View real-time earnings and session history for your hardware.
- User Communication: Receive and respond to messages from users renting your resources.
How It Works
Access the Marketplace
Authenticate on the OctaSpace Marketplace https://marketplace.octa.space/ using your credentials or create new user using e-mail/password combination. You can also use Google, Apple or GitHub account to authenticate. OctaSpace Marketplace shares authentication with Cube application for node owners.
Top-up your balance
Add Octa coins to your marketplace balance using button "Top-up balance" on the top. Your Octa crypto wallet address will be displayed along with QR code with the same address. Also you can see your current balance near Top-up button. Please note that you can not withdraw Octa from your Marketplace wallet.
Browse Applications
Navigate to the Apps dashboard from the left panel, where you’ll find the list of available application images. Here you can select one application for deployment. Applications divided by categories. Also additional description available for application when mouse hovering over application card. After clicking on application you will be redirected to Compute Rental page which will allow to select one or more nodes for application deployment.
Node Selection
Choose the target nodes where the application will be deployed. Node could be filtered and sorted based on lot's of parameters like price, country, CPU/GPU parameters, memory, disk size, network speed and benchmark scores.
View node details such as available resources like CPU, GPU count and details, RAM, disk size and network speed as well as node price. You can use additional switches on the top to switch between hardware details and benchmark scores (Blender/AI). Also you can switch between node pricing using Octa coin or corresponding USD price.
After selecting one or more node you will have "Configure" button available.
Configure and Deploy
For you reference on this page you will see deployment costs, list of selected nodes and selected app for deployment which you chosen on previous steps. You can also change selected app on this page or select new one if it was not selected before (you can start process from node selection, for example).
You can customize application settings, such as start command for overriding default image start command, image name if you would like to use custom image instead of one that available in marketplace, allocated disk size for deployment (how much disk will be available for application), exposed HTTP and TCP/UDP ports which will be available for application access, environment variables to customize image. For the applications provided by marketplace this could be left to default.
Click the "Deploy" button to initiate the deployment process. After deployment you will be redirected to "Sessions" dashboard providing list of currently active deployment sessions.
Access deployed application
On the "Sessions" page you will see all applications that currently deployed on nodes. For each session you will have UUID for troubleshooting, App name, session duration, Status, Id of node running application, incoming and outgoing traffic and amount of charged Octa per session. Charges are updated per minute.
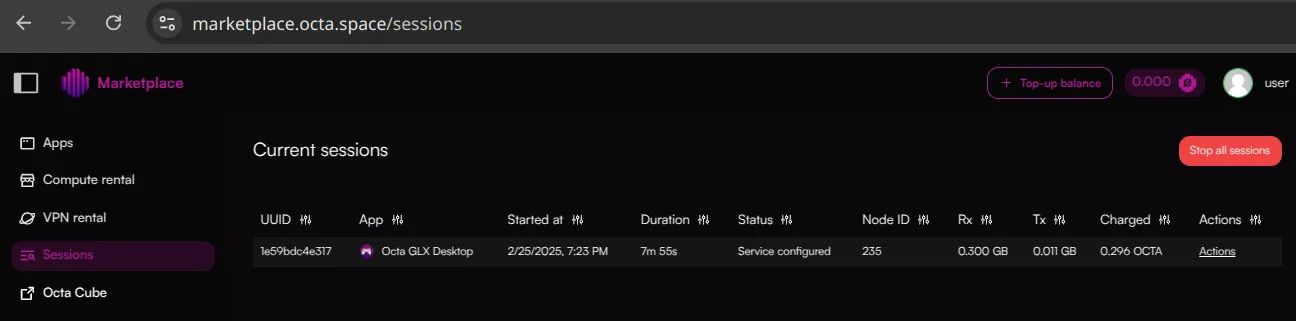
Sessions can have several statuses, like "Pulling image" when user node pulling corresponding application image from repository, "Configuring HTTP services" when application starting, "Setting SSH" when SSH configured (if applicable), "Downloading models" or "Configuring services" when service needs additional actions during service startup after image download. Status "Service configured" means that application is started, configured and ready for use.
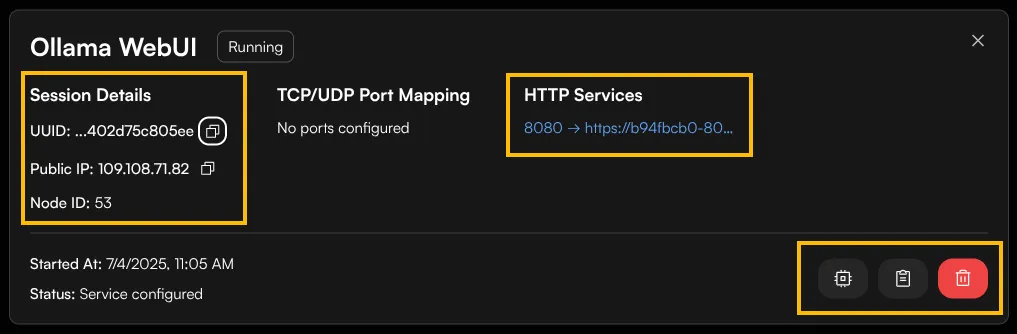
By clicking on each session line you will have additional session details where will be links to application interface access via HTTP (if it available for this application), link to Web SSH access in case it's available, "trash" button to stop the session and buttons to view logs and node details near it.
There is list of historical user sessions available on the Cube dashboard https://cube.octa.computer/dashboard for all sessions that you was running in the past. You can clich on each row to see details about past session. You can also click on the button in "Status" column there to see logs for past session. Each log has tab for application container start and for application running in node container itself, but only last part of application log displayed, if log size exceeds buffer.

SSH Access
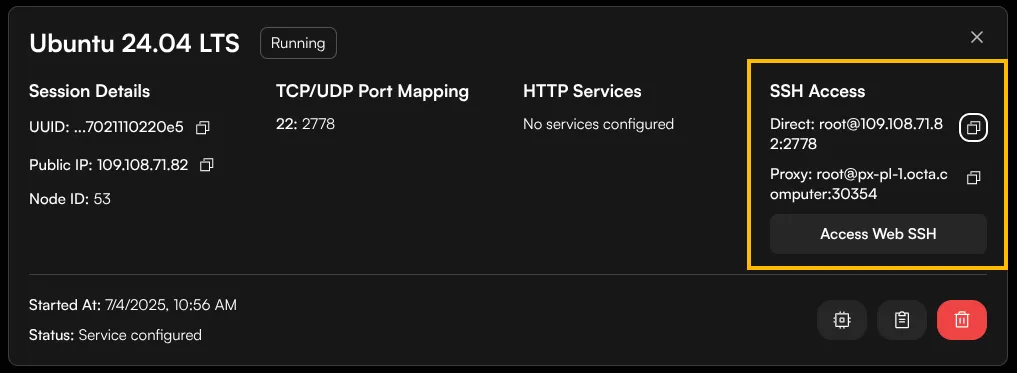
For some compatible images WebSSH access is enabled allowing you to have SSH session to running application container directly from your browser. Also regular SSH access could be available using "ssh" command ot GUI tools like PuTTY.
For Web SSH access your console already have tmux running in your session https://github.com/tmux/tmux/wiki/Getting-Started for opening several consoles to running application container if needed. E.g. you can use "Ctrl+b c" to create new console window and "Ctrl+b n", "Ctrl+b p" and "Ctrl+b <num>" to switch between console windows. Here is a list of a few basic tmux commands: Ctrl+b " — split pane horizontally. Ctrl+b % — split pane vertically. Ctrl+b arrow key — switch pane. Hold Ctrl+b, don’t release it and hold one of the arrow keys — resize pane. Ctrl+b c — (c)reate a new window. Ctrl+b n — move to the (n)ext window. Ctrl+b p — move to the (p)revious window.
You can use command "trz /path" to upload files to running application using WebSSH and command "tsz /path/to/file" to download files in this console. For example, if you want to upload some file to your running node session in WebSSH, enter command "trz /path/to/upload" and you will see dialog window to choose wich file to upload from your local system. If path is not specified (command is just "trz"), it will upload to current directory. If you want to download file from your running node session in WebSSH, e.g. "file.ext", enter command "tsz /path/to/file/file.ext" and you will see dialog window to choose where you want to save this file on local system. Or you can just enter "tsz file.ext" if file already in current directory. Please see for the details https://trzsz.github.io/ (R and S in this commands can suggest direction of file transfer, looking from remote node side, tRz - receive file to node session from your local computer, tSz - send file from node session to your local computer).
Regular SSH connection available for container using any SSH client. E.g. you can use OpenSSH connection string like "ssh [email protected] -p 30053" assuming that your SSH key is in default location. If node provides external IP address, then there is two ssh connection strings provided in node details direct and proxy (via proxy server if no external IP for node).
To use regular SSH access with "ssh" command you should add your SSH Public Key on "Settings" tab of Cube Profile https://cube.octa.computer/profile Also there is possibility to update password, set 2FA for account as well as other settings.